Imagine a natural disaster strikes without warning. Your home becomes unsafe, emergency services are overwhelmed, and finding immediate shelter is a race against time. Would you know how to build a safe, reliable emergency shelter with minimal resources? Having this skill can protect you and your family during disasters. Here’s a complete guide to building a DIY emergency shelter that can save your life when every second counts.
- ✅ Why Building an Emergency Shelter is Essential
- ✅ Essential Materials for Shelter Building
- ✅ Step-by-Step Guide to Building Your Shelter
- ✅ Bonus Tips for Improving Shelter Durability
✅ Why Building an Emergency Shelter is Essential
Shelters protect against extreme weather, animals, and environmental dangers. In emergencies like wildfires, earthquakes, or floods, traditional housing may no longer be safe. A DIY shelter ensures that you have a fallback option if evacuation centers are full or inaccessible. Shelter also preserves your body heat, shields you from rain or snow, and offers psychological comfort—critical factors in survival.
✅ Essential Materials for Shelter Building
You don’t need expensive gear to create a sturdy shelter. Focus on materials that are lightweight, durable, and easy to assemble:
- Tarps or Emergency Blankets: Waterproof protection from rain and wind.
- Rope or Paracord: For tying frames and securing coverings tightly.
- Branches, Poles, or PVC Pipes: Form the structure’s frame.
- Insulation Materials: Leaves, straw, pine needles for warmth.
- Shovel or Digging Tool: Prepares the ground and helps dig drainage trenches to prevent flooding.
Pro tip: Always include a basic shelter kit in your emergency go-bag!
✅ Step-by-Step Guide to Building Your Shelter
Follow these steps for a quick and effective DIY shelter:
- 1. Choose the Right Location: Pick dry, elevated areas away from flood zones and falling debris.
- 2. Set the Foundation: Clear debris, flatten the ground, and lay insulating materials underneath.
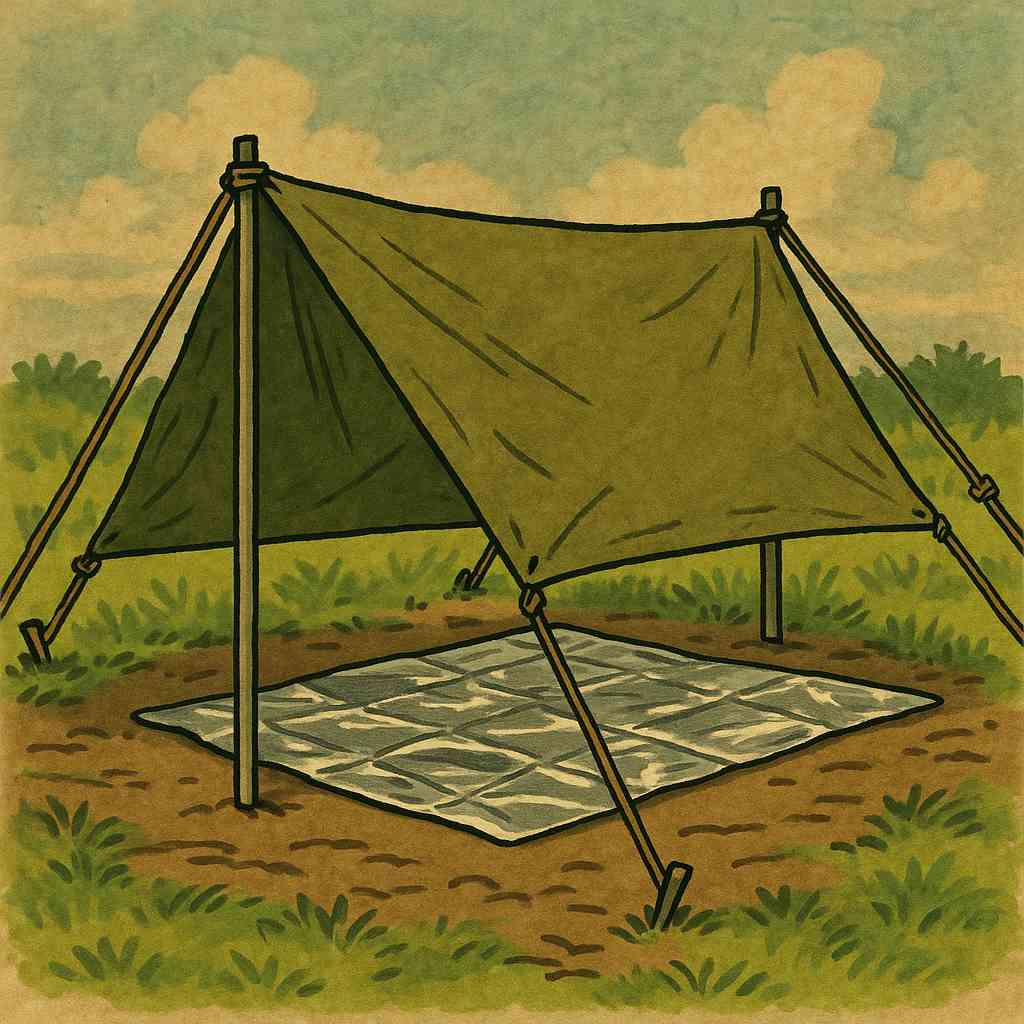
- 3. Build the Frame: Use branches or poles to form a lean-to or A-frame shape. Tie them securely with rope.
- 4. Cover and Secure: Drape the tarp or blanket over the frame and anchor it firmly with rocks or stakes.
- 5. Add Insulation: Pile leaves or straw along the sides and floor for warmth and additional protection.
- 6. Test for Stability: Gently push against the structure to ensure it holds. Strengthen if necessary.
Always design your entrance away from prevailing winds for better comfort.
✅ Bonus Tips for Improving Shelter Durability
Enhance your shelter’s resilience by:
- Reinforcing the Roof: Add an extra tarp layer or thicker branches to prevent leaks.
- Elevating the Sleeping Area: Lay down branches or pallets to stay off damp ground.
- Securing Against Wind: Bury the edges of the tarp and tighten anchor points for better wind resistance.
- Camouflaging if Needed: Cover the shelter with natural materials like leaves to blend in with surroundings if discretion is important.
Remember: the stronger your shelter, the better your chances of surviving extreme weather conditions.
Building a DIY emergency shelter is not just a survival skill—it’s peace of mind. With simple materials and preparation, you can protect yourself and your loved ones when disasters strike. Practice these techniques now, and you’ll be ready to face any situation with confidence and resilience.
✅ Frequently Asked Questions (FAQ)
- Q1. How long does it take to build an emergency shelter?
Basic shelters can be built in 30 minutes to 2 hours, depending on materials and experience. - Q2. What’s the best shelter design for heavy rain?
A-frame shelters with steep angles are best for shedding rain and avoiding leaks. - Q3. Can I build a shelter indoors during a disaster?
Yes! Use mattresses, furniture, and blankets to create safe spaces during indoor emergencies like tornadoes or earthquakes. - Q4. What if I don’t have a tarp or rope?
Use any large plastic sheets, garbage bags, or even coats, and improvise ties with vines, shoelaces, or belts.
For more disaster preparation strategies, check out our guide on bug-out bag essentials to build a complete survival plan.
For official shelter guidelines, visit the Ready.gov Shelter Guide.